Wednesday, July 10, 2013

How to make your own sarong wrap


     July is already here, and if we are not heading to the beach, the pool is always a great idea. Wearing a sarong simplifies dressing and covering up while offering a fashionable look. A sarong wrap also gives you dress options because you can turn it into a dress or a skirt really fast, and wear it the way you feel comfortable that day.
     There are many styles out there, and you can use just a rectangle fabric and tie it with flare. To make my sarong I used three patterns: left side, right side and a back.The back is shaped at waist with two darts. The right panel( which becomes front) has an extension at the end and the left panel( which will be the under-side front) has a sewn tie, allowing for wrapping around your waist, going through a side opening, and tying at the side. When used as a dress, the long tie allows for good wrap around the neck.

Here is the sarong:

Measurements for a Small/Medium size:
Back panel: 15” wide after sewing 2 darts of 1.5” each.
Left panel: 11”( add a sewn tie of 2”x 33”)
Right panel: 28” to the end of tie. This panel is also shaped to be only 12.5” wide at the hem.
The sarong is 33” long, so it would come to your calf if worn as skirt, and to your thigh if is worn as a dress.
Happy sewing!


Sunday, July 7, 2013

Where do you find inspiration?

Since opening my etsy store I am always on the lookout for inspirational sayings.  A large part of my store is made up of typographic art.  I thought I would share some of my more popular prints with you today.

This quote is by Maya Angelou:


Here's a quote from the late Martin Luther King, Jr.:


Here is a quote from a former First Lady of the United States - Eleanor Roosevelt:

 
On a more humorous note, this quote is from Julia Child:
 
 
and from Dr. Seuss:
 
 
Vintage backgrounds courtesy of The Graphics Fairy.
 

Typography for Kids


Did your mom ever sing this song to you?
 

How about this one? Hush little baby don't say a word, momma's gonna buy you a mockingbird.

 
This one is actually a song by Stevie Wonder - Isn't she lovely, isn't she wonderful...

 
Do you have a favorite inspirational phrase or song?  If so, feel free to share it here.
 
Until next time.
 
Thanks for stopping by,
 

Tuesday, June 18, 2013

Free Wedding Anniversary Card Printables and Gift Ideas


Did you know that June is the most popular month of the year to marry, followed by August, July, May, and September.  The reasons for June being so popular go back to ancient times.  The Romans celebrated a festival to honor Juno, the wife of Jupiter and goddess of marriage and childbirth, on June first.

During the Middle Ages when hygiene was almost nonexistent, June was the month people took their yearly baths.  So a June wedding signified a good beginning!  Also, did you know that flowers were originally used to mask body odor.  Interesting!
Today June remains a popular choice for couples which means you may know someone who is getting married or having an anniversary.  I wanted to share some free anniversary cards with you today and then some gift ideas for that special couple.


Free Anniversary Cards


Retro Couple graphic courtesy of The Graphics Fairy.

 
Graphic courtesy of Antique Graphics. 


Picture courtesy of The Graphics Fairy.


Now for some gift ideas from our Etsy stores...

 
Here is a wonderful way to remember that special day.  Zoica can create a custom illustration of the wedding gown to enjoy and admire for years to come.  This makes a perfect gift for yourself or a special gift for the bride-to-be.  Just click on the pictures and you will be taken to our Etsy stores.


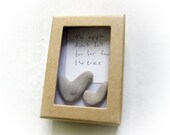
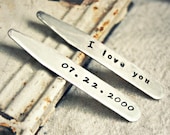
Here are some other gift ideas to remember that special day.  These are a great gift idea for yourself or for that special couple...


And here is a great idea to celebrate family...


Until next time...
 

Friday, June 14, 2013

More Free Greeting Card Printables

Free Baby Shower Printables

Once again I am going to share some cards with you from my Etsy store.  Today's cards can be used to welcome a new baby.  As a reminder the cards are sized 10 x 6.5 (or 5 x 6.5 when folded) and can easily be printed on letter size paper.  They are best printed on matte photo paper.  I used Epson but I am sure any type will do.  You can find envelopes at Joanns, Michaels, or Hobby Lobby to fit.  Once printed, just cut along the light gray line using a xacto knife and metal ruler.  Use the back of the xacto to score the card down the middle and fold - Voila!

For the baby girl...

For the baby boy...

And for those who prefer to be surprised...

 
Happy printing...
 
Vintage buggy graphics courtesy of  Antique Images
 
Pink lattice background courtesy of The Graphics Fairy
 
Until next time...
 

Sunday, June 9, 2013

Father’s Day Gift Treasures


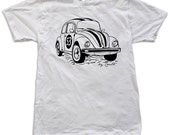
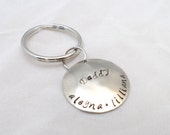
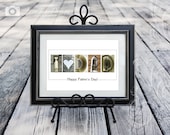
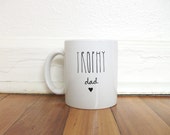
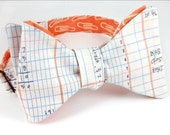
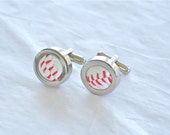
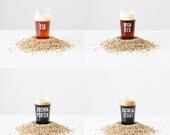
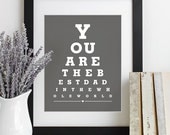
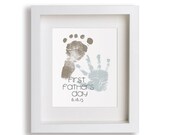
    It’s still time to order a gift for Father’s Day! If you are looking for an unusual, unexpected, and creative gift for Father’s Day, here are some of my picks. I just created a “Treasury” on my Etsy shop, by selecting articles from some of the very creative members of the Etsy community. From handmade accessories like bow ties and cufflinks, to beer and framed wall art, you can definitely find something for your taste, and budget.
Here is my treasury:


Saturday, June 8, 2013

How to Decoupage (continued)

I couldn't find a stand for my mannequin that I decoupaged last week so I ordered a dress form and a stand from amazon.com.  Here's what the mannequin looked like when I received it.


What I liked about it (besides the price - it was only $70) was the stand.  The dress form was padded and covered.  I removed the fabric.  The foam was glued down so it was difficult to remove in some places.  I used a sanding block to remove the foam that was stuck to the form. The body was fiberglass which was not difficult to decoupage.  However, looking back I should have given her a coat of spray primer.


And here is the finished project:


Once again, the graphics are from The Graphics Fairy.
 
What do you think?  I think I'm done with mannequins for a while! Although I still have to think of something to do with the first one.  Maybe a lamp... :)
 
Until next time...


Tuesday, May 28, 2013

How to Decoupage

My Weekend Project

One of my students recently gave me a mannequin from his store.  When I brought it home, my family thought I was crazy and asked me what was I going to do with that?  I said decoupage!

If you've never decoupaged before, you don't know what you are missing.  Decoupage is the art of decorating an object by gluing paper to the object. Over the years, I've decoupaged a few things including a box, a tray, and even a table.

Here is a list of supplies that I used:

Elmer's Glue
Printed graphics
Polyurethane (varnish)
Glaze (raw umber)
Paint brush

My mannequin had a hole in her belly.  I patched her up using simple blue painter's tape.  I started with graphics that I got from the Graphics Fairy.  I printed them out on a laser printer.  You can't use a regular printer because when you use the glue the ink will run.  I tore around the graphics and included some blank pieces of paper as well. When I printed the graphics, I kept them fairly small.  I watered down the glue and started applying glue to the mannequin with a paint brush.  Then I added a piece of paper and applied some more glue.  Make sure you apply the pieces of paper in a random matter.  You don't want your design looking too even.


I kept adding paper until she was covered.


I let her dry overnight.
 
The next day, I covered her with a coat of polyurethane.  I used Modern Masters Satin Varnish.  I had some left over from my faux finishing days.  I simply painted it on with a paint brush.  You could also use a spray varnish.  Just make sure whatever you use is water based.  You don't want your paper turning yellow.
 

I let her dry overnight.  The next day, I painted on some raw umber glaze (brown).  You can purchase this at your local craft store or mix up your own using glaze and paint.  Mine was left over so I can't really tell you what I used.  My grandkids asked what I was doing and I told them I wanted to make her look old.  They couldn't understand that!  By applying the varnish before you glaze, you can manipulate the glaze better.  Go light or heavy - it's up to you.  I let the glaze dry overnight and the next day I applied 2 more coats of Satin Varnish and Voilà - my finished mannequin!


My next goal is to find a stand for her to sit on.  If anyone has any suggestions, please share.

Thanks for stopping by.

Until next time...